Wpf 3D Helix Pen Demo
** Note: new information is in green text **
There is also a new section called "Source Code"
A MathCompiler3D Demo
In this article a Pen has been built with Wpf 3D Helix and C# inside of the MathCompiler3D application. Then, the 3D Model was exported to a standalone Wpf application (so that the viewer) could continue on with their own custom project. The export view area has been expanded to include 2 views. As you make additional changes to the 3D model to give the "pen" more features, the model would be re-exported so that your custom app could acquire the updated 3D graphics, Math Equations, and 3D targets for the mesh properties from those equations depending on which techniques you use to create your "pen" 3D model. The executable that will install through and .msi / setup.exe from the archive at the top of the page [Wpf3DHelixPenDemo.zip]. The exported standalone application is still in the beta version and was originally meant to for testing the math equations, then the 3D model, and thirdly - animation. Though parts of this export is optimized, parts of it are still under construction and have yet to be refined. On the right side at the top of the screen there is an available archive for the source code of the export (under: Demo Source Code).
The process of exporting your 3D model, math equations, and targets into your own standalone Wpf app, allows you to send installable demos to prospective clients.
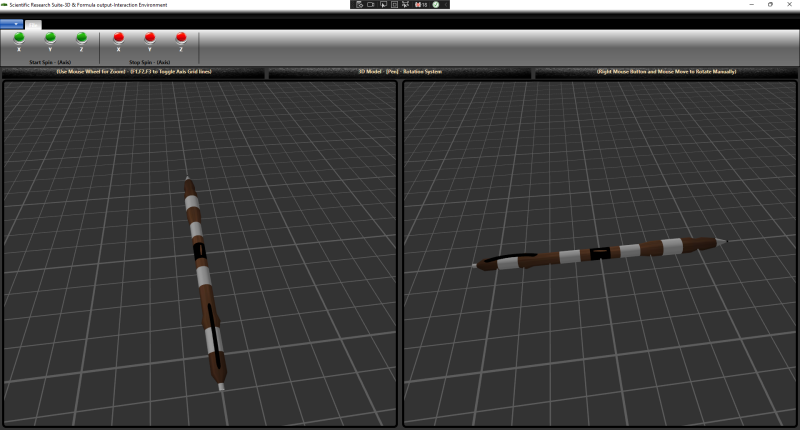
The Visual
The screen below is the afore mentioned Wpf 3D C# exported standalone app. The mouse controls are as follows: use the mouse wheel to zoom in and out on the 3D image. If you hold down the right mouse button and move the mouse in the 3D viewport area (on the left), then you can manually rotate the Pen image. The right viewport is not hit test visible. On the ribbon, there are two groups of buttons: Start Spin & Stop Spin. If you click on the Green X button, then the pen will begin rotating around the X Axis, you can then add Y & Z axis spins at the same time if desired. Note that for this demo, clicking on the stop X, Y or Z axis red buttons will reset the value on that particular axis (meaning it will "snapback" to 0° rotation). The right viewport has been added to show a different angle of the pen. F1, F2, F3 will toggle the axis grids to help with perspective. The X Axis grid lines are now on by default.
Demo Installation
If you have installed one of the other demos in the series for MathCompiler3D, uninstall that demo prior to installing this demo.
Technical Support
If you have any issues installing the demo or viewing / running the source code send an email to Contact@MathCompiler3D.com
Source Code
The pen demo solution was created in Visual Studio community 64 bit V17.4.3

See the red curved edge rectangle for the source code archive at the top right of the web page.

This is what the exported pen demo source solution tree looks like.

When you download the source code the zip file will look like this:

The solution you are looking for is shown below.
After downloading the archive from the right top of the web page and extracting all into downloaded – I tested by running with F5 and the pen came up as expected.

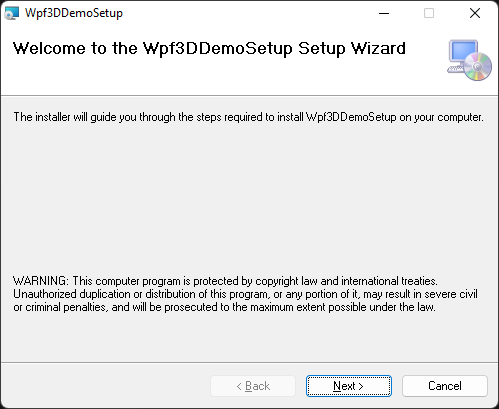
Installation Instructions - Windows 11 - (Other Operating Systems may vary somewhat)
Click on the download button at the top Left of the screen under the title "Demo."
Navigate to your downloads folder using windows explorer.
Right click on Wpf3DHelixPenDemo.zip and extract the files to a location you have permissions to on a local windows 11 Machine.
Double click on your extracted folder and then double click on Setup.exe
Your installation screens may vary depending on the prerequisites based on your current machine configuration.


After your hit the close button in the dialog below, press the windows key and start typing "Math Compiler 3D Exported Pen Demo." The application should show up under "Best Match" - left click on the application to run.
Note: There is no automatic positioning at this time for initial Field of View or zoom level. Adjust manual using the mouse wheel before you start the animation.
