Conceptual Design - 3D Magazine - Inaugural Issue
Page #3

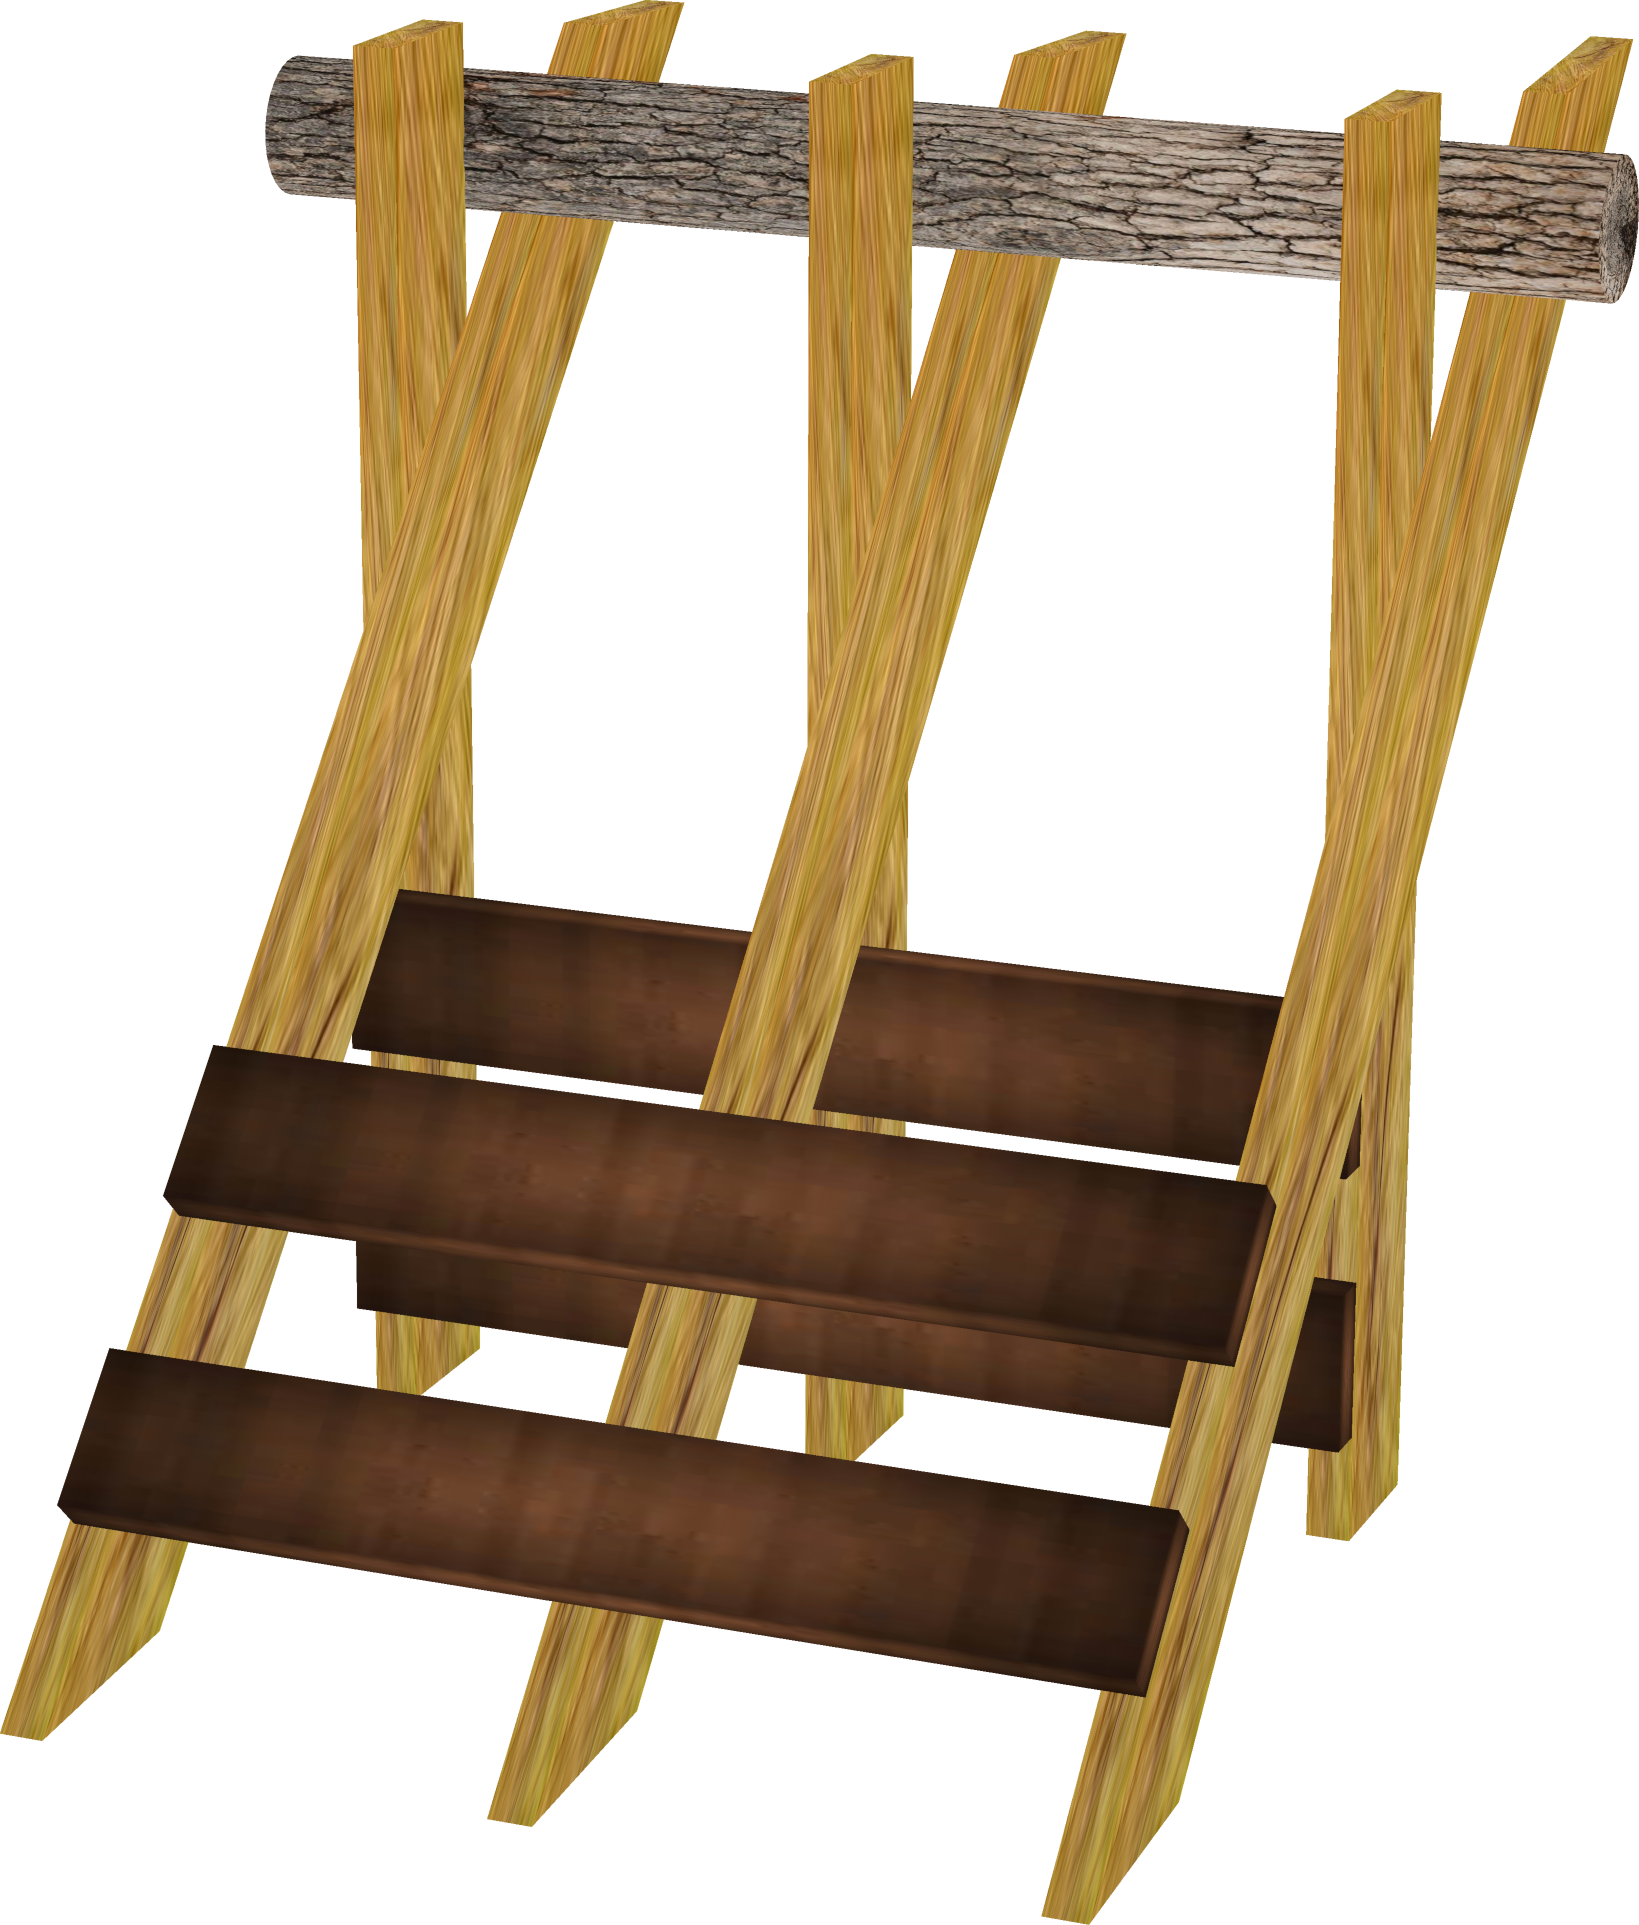
Cross Saw Buck
Formulas - V1-0-0 | V1-0-1 | V1-0-2
Hard to move
The cross sawbuck was awkward to move. One way to improve it would be to resign it so there is a pallet underneath that forklift or tractor can pick up. The other problem with this style is you end up stretch your arms out to much from having to learn over. Having one side straight up and down and the other side at an angle would help this.

At first glance, this V1-0-1 may appear the same but take a closer look on the back side. One of the challenges you run into either as a conceptual engineer or a production engineer is not having experience with the product you are designing. In this case, having using used this sawbuck extensively in the wood yard for a long period of time, I gained some knowledge that I wouldn't normally have.
When actually using the chainsaw to carve out 16" pieces, its difficult to cut the wood straight. In version V1-0-1 the X shape is completed using double thickness on the back side and the formula has been updated to be parametric on the X axis (or in other terms, the width of the saw buck now available on the control panel through the Width equation).

Effects of the Formula Change in V1-0-1
The first thing that will quickly become apparent is that the sawbuck is now heavier due to the extra wood to complete the X shape. A way to compensate for this is to add detachable handles (perhaps something like wheel-barrow handles) and of course a wheel.
Another way to handle the weight issue is to design with light dry wood. Often times if you shop at Home Depot or Lowes - (depending on the lumber yards in your area) you will get Green hemlock or green Doug Fir which of course is very heavy. Cedar is always the go-to wood since it is light-weight but you have to consider the expense. If you have a chainsaw mill, a portable saw mill or similar machinery, then you may be able to connect with a tree service to get the material you need. If cedar turns out not to be an option then perhaps dry spruce would be the next best, or in a pinch, settle for dry white wood for weight reduction.
If you are using this sawbuck in your shop on a cement floor or a well built smooth wood floor, you could adapt the foot pedal press and wheel system of an old table saw and create a structure underneath so it would be easy to roll.
If you are out in the field, you might add larger wheels with using the same table saw foot pedal concept and add a trailer hitch so that the weight doesn't matter which will give you pulling access by your truck, tractor, or 4x4 to move it around. With a trailer you can take this sawbuck onsite using one of the previously mentioned machines.
The Technical Stuff - (Math)
Control Panel - Slate

The Width variable controls the placement of the of the X structures and the 4 cross braces (2 on each side). The outer most length of the sawbuck it set by the Width variable. The center X constructure (being the thickness of 2 2x6's) is positioned at 0 on the X axis so that both the left and the right sides. In a future version, a new parametric variable will be added so that the center sections will be at a 16 1/4" (taking the bar into account) that that your firewood is uniform on every cut - thus adjusting the Width variable automatically. If your sawbuck is for trimming only then the center length is less important but still nice to have because as time goes on, your needs may change.
Cross Slats - Slate
CrossSlatWidth - pulls in the value from the Control Panel Width equation of the sawbuck. This may seem like a redundant equation but the more you design in parametric 3D, you will find its better to have connected equations than to have all the same positions routed through a single equation. Keep in mind the next version or modification that you will make, and you will set yourself up for a more adaptive design to changes.
Left & Right board X - these are determining the position of the X axis construct on the far side of the SawBuck.
Left & Right Opposite board X - these are determining the position of the X axis construct on the close side of the SawBuck.
Center & Opposite board X equations position the center X's so that the middle of the double x is at 0.

Upper Extensions - Slate
These control the completion of the X on top so that the center sections are of equal distance

Sorting an organizing
As you create project revisions the organization of your 3D objects will refine. You will change the layout of your slates and create additional slates and move equations so that the picture of your parametric model becomes easier and easier to modify and get to the precise design that your are looking for. The same is true for this cross sawbuck.
Formula Change in V1-0-2
For Cross Sawbuck V1-0-2 one side has been straighten to eliminate having to reach out in order to cut. Sometimes with simple variations of the same model, you can get a completely different experience. Since MathCompiler3D allows versioning, you still have the previous versions available if you wish to continue the design from one of those.
Conceptual Design - 3D Magazine - Inaugural Issue
Page #3